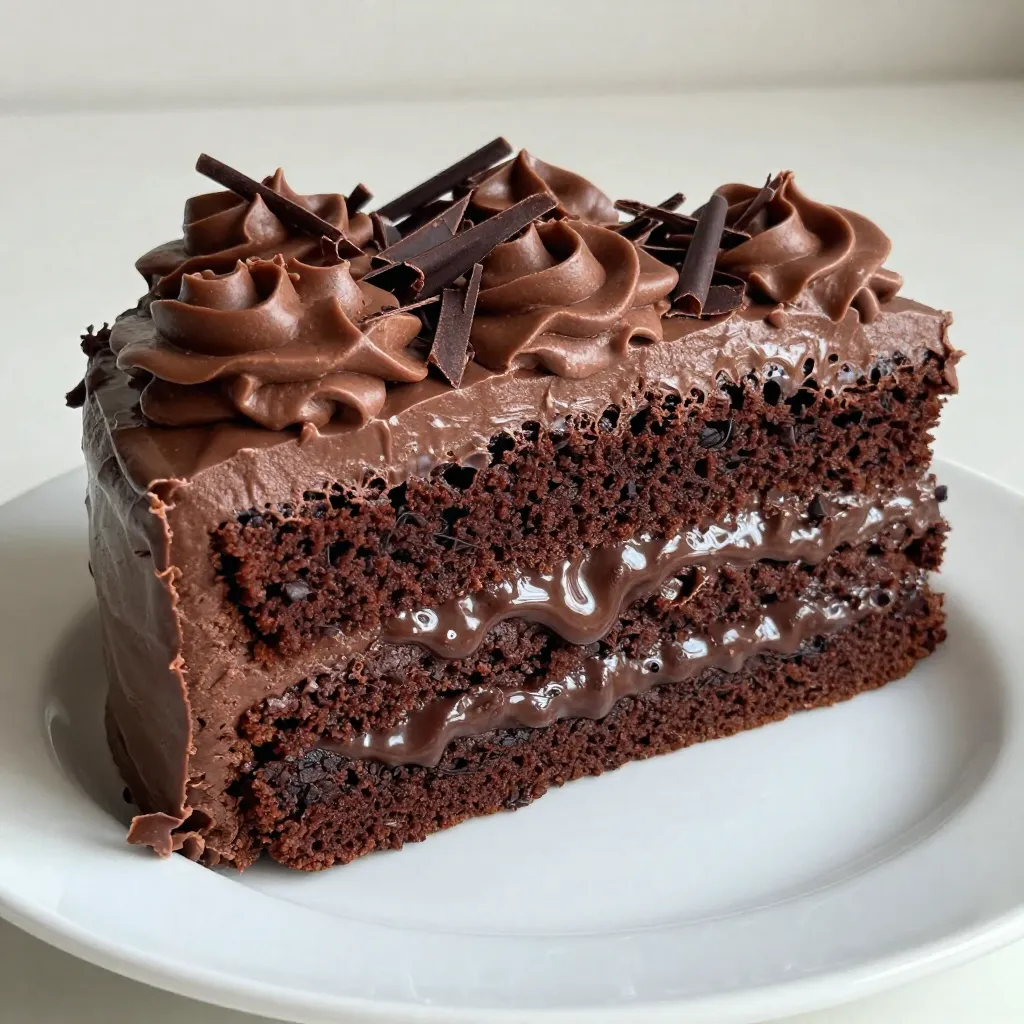
If you love chocolate, you’re in for a treat! This Triple Chocolate Layer Cake is the ultimate dessert that satisfies every chocoholic’s dream. With rich layers of semi-sweet, dark, and milk chocolate, each bite is pure bliss. I’ll guide you through simple steps to create this decadent delight that will wow your friends and family. Ready to indulge? Let’s dive into the delightful world of chocolate!
Why I Love This Recipe
- Decadent Layers: This cake features three rich layers of chocolate, each providing a unique taste of chocolate bliss.
- Perfect for Celebrations: Whether it’s a birthday or an anniversary, this cake is a showstopper that impresses at any event.
- Easy to Make: Despite its impressive appearance, the steps are straightforward and manageable for bakers of all levels.
- Customizable Frosting: With both dark chocolate ganache and milk chocolate frosting, you can adjust the sweetness to your liking!
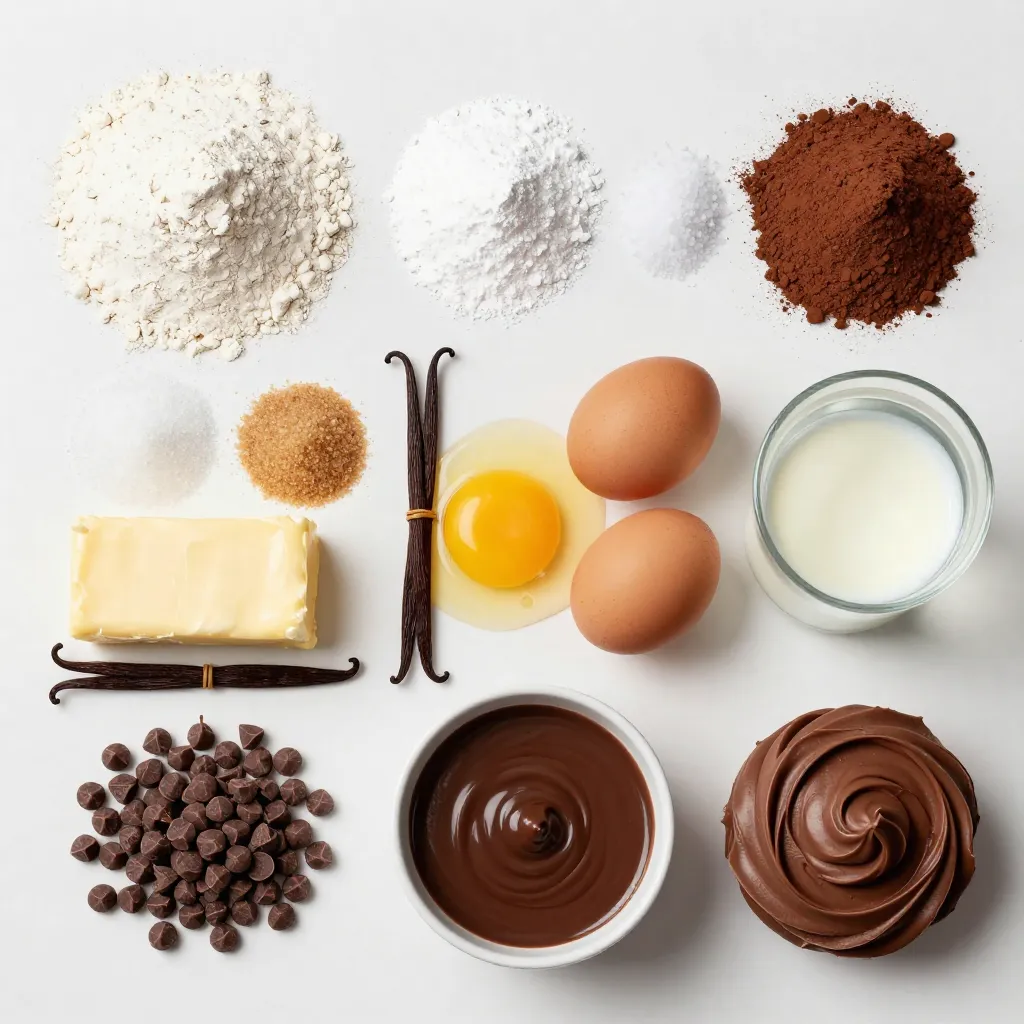
Ingredients
Dry Ingredients
– 1 ¾ cups all-purpose flour
– 1 ½ teaspoons baking powder
– 1 teaspoon baking soda
– ½ teaspoon salt
– ½ cup unsweetened cocoa powder
These dry ingredients form the base of our cake. The flour provides structure, while baking powder and baking soda act as leavening agents. They help the cake rise. The cocoa powder adds rich chocolate flavor, which is key for a chocolate cake.
Sugars and Butter
– 1 cup granulated sugar
– ½ cup brown sugar, packed
– ¾ cup unsalted butter, softened
Using both sugars gives the cake a nice depth of flavor. Granulated sugar sweetens and helps the cake rise. Brown sugar adds moisture and a slight caramel taste. Butter enriches the cake, making it soft and tender.
Wet Ingredients
– 2 large eggs
– 1 teaspoon vanilla extract
– 1 cup buttermilk
– 1 cup boiling water
Eggs provide structure and moisture. Vanilla extract adds a warm flavor. Buttermilk keeps the cake moist and tender. The boiling water thins the batter, making it easy to mix and bake, ensuring a perfect texture.
Chocolate Elements
– 1 cup semi-sweet chocolate chips
– 1 cup dark chocolate ganache
– 1 cup milk chocolate frosting
Chocolate chips add bursts of chocolate in each bite. Dark chocolate ganache adds a rich layer between the cake layers. Finally, the milk chocolate frosting gives a smooth, sweet finish to this decadent treat.
Step-by-Step Instructions
Preparing the Oven and Pans
Start by preheating your oven to 350°F (175°C). This temperature helps the cake rise well. Next, take three 9-inch round cake pans. Grease each pan with butter or cooking spray. Then, dust them lightly with flour to prevent sticking. This step ensures your cake comes out easily.
Mixing Dry Ingredients
In a large bowl, sift together the dry ingredients. Use a fine mesh sieve for best results. Combine all-purpose flour, baking powder, baking soda, salt, and cocoa powder. Sifting adds air and breaks up clumps. This creates a smoother batter and better texture.
Creaming Sugars and Butter
In another bowl, cream the granulated sugar, brown sugar, and softened butter. Use a mixer on medium speed for about 3-4 minutes. You want the mixture to be light and fluffy. This step adds air, which helps the cake rise.
Combining Ingredients
Add the eggs one at a time to the butter mixture. Mix well after each addition. Then, stir in the vanilla extract. Next, alternate adding the dry mixture and buttermilk. Mix until just combined. This helps keep the batter light and airy.
Baking Process
Pour equal amounts of batter into each prepared pan. Bake for 30-35 minutes. To check for doneness, insert a toothpick into the center. If it comes out clean, your cake is ready. Let the cakes cool in the pans for 10 minutes. Then, transfer them to wire racks to cool completely.
Making Ganache and Frosting
For the dark chocolate ganache, heat 1 cup of heavy cream until it simmers. Pour it over 8 ounces of chopped dark chocolate. Stir until smooth and let it cool. This thickens the ganache for layering. For the milk chocolate frosting, beat ½ cup of softened butter with 1 cup of milk chocolate until creamy. Mix in 2 cups of powdered sugar and a splash of milk for the right consistency.
Assembling and Frosting the Cake
Place one cake layer on a stand or plate. Spread a layer of dark chocolate ganache on top. Place the second layer on top and repeat. Finally, add the third layer. Use the milk chocolate frosting to cover the entire cake. Smooth the sides and top to your liking. For a special touch, chill the cake for 30 minutes to set the frosting. Decorate with chocolate shavings or curls if desired.
Tips & Tricks
Baking Success Tips
To bake your Triple Chocolate Layer Cake perfectly, start by preheating your oven to 350°F (175°C). This step helps your cake rise well. Grease and flour your three 9-inch round cake pans. This prevents sticking and allows for easy removal.
Make sure to sift your dry ingredients well. This keeps air in the flour and ensures an even mix. Mix the baking powder, baking soda, salt, and cocoa powder together. This avoids clumps and helps your cake rise evenly.
Common baking mistakes include opening the oven too soon. Each time you open the door, heat escapes. Wait until the minimum baking time has passed before checking. Also, avoid overmixing your batter. This can lead to a tough cake.
Perfecting Ganache and Frosting
To make smooth ganache, heat heavy cream until it simmers. Pour it over chopped dark chocolate and stir until it melts. Let it cool slightly for the right thickness. If it’s too runny, it won’t hold up between the layers.
For the milk chocolate frosting, beat softened butter and milk chocolate until creamy. Gradually add powdered sugar and a splash of milk. This helps you reach the perfect spreadable consistency. If the frosting is too thick, add a bit more milk.
Presentation Tips
When assembling your cake, layer it with care. Spread ganache between each layer for a rich taste. For a beautiful finish, cover the entire cake with milk chocolate frosting. Smooth the sides and top for a clean look.
For decoration, consider chocolate shavings or curls. They add a nice touch and look stunning. Serve the cake on a nice plate or cake stand. This makes it more inviting and enhances the dessert experience.
Pro Tips
- Use Room Temperature Ingredients: Ensure your butter, eggs, and buttermilk are at room temperature for a smoother batter and better rise.
- Don’t Overmix the Batter: Mix until just combined to avoid tough cake layers. A few lumps are perfectly fine!
- Check for Doneness: Use a toothpick to check if the cakes are done. Insert it in the center; it should come out clean or with a few moist crumbs.
- Cool Completely Before Frosting: Allow the cakes to cool completely on wire racks to prevent the frosting from melting.
Variations
Dietary Alternatives
For those needing gluten-free options, you can replace all-purpose flour with a gluten-free blend. This swap works well, keeping the cake moist and delicious. Look for a blend that contains xanthan gum for the best texture.
If you want to make the cake vegan, swap the eggs for flaxseed meal. Mix one tablespoon of flaxseed with three tablespoons of water for each egg. Use a plant-based butter and non-dairy milk, like almond or oat milk, in the recipe for a tasty vegan treat.
Flavor Modifications
Want to give your cake a twist? You can add flavors like espresso or orange zest to the batter. Just mix in about 1 tablespoon of espresso powder or the zest of one orange. These flavors enhance the chocolate and add a fun surprise.
You can also play with different types of chocolate. Try using white chocolate chips instead of semi-sweet for a sweeter cake. Dark chocolate can deepen the flavor. Just make sure to adjust the sugar if you use sweeter chocolate.
Serving Suggestions
Pair this cake with a nice beverage. A cup of coffee or a rich red wine enhances the chocolate flavor. You could also serve it with cold milk for a classic combo.
For a special touch, add a scoop of ice cream on the side. Vanilla or mint chocolate chip ice cream pairs perfectly. You can also serve whipped cream or fresh berries to brighten the dish. Enjoy!
Storage Info
Storing Leftovers
To keep your Triple Chocolate Layer Cake fresh, wrap it well. Use plastic wrap or foil. Store it in an airtight container. This helps keep moisture in and air out. I often use a cake dome for easy access and good air flow. If you do not have a dome, any container will work, as long as it’s sealed tight.
Freezing the Cake
You can freeze the cake layers for later use. First, let the layers cool completely. Wrap each layer in plastic wrap. Then, place the wrapped layers in a freezer bag. This helps prevent freezer burn. When you want to eat the cake, take it out. Leave it in the fridge overnight to thaw. You can frost it once it’s soft.
Shelf Life
At room temperature, the cake lasts about 2-3 days. Make sure to cover it to keep it fresh. In the fridge, it can last about a week. Just remember, the longer it sits, the less fresh it might taste. Always check for any signs of spoilage before enjoying your cake.
FAQs
What can I substitute for buttermilk?
You can use yogurt or milk mixed with vinegar. For each cup of buttermilk, mix 1 cup of milk with 1 tablespoon of vinegar. Let it sit for 5 minutes before using. This method works well in most recipes.
Can I make the cake in advance?
Yes, you can prepare the cake ahead of time. Bake the layers and let them cool completely. Wrap them tightly in plastic wrap and store them in the fridge for up to 2 days. You can also freeze the layers for up to 3 months. Just thaw them in the fridge overnight before frosting.
How do I know when the cake is done baking?
To test if the cake is done, insert a toothpick into the center. If it comes out clean or with a few crumbs, the cake is ready. Avoid opening the oven door too early, as this can cause the cake to sink.
Can I use different pan sizes?
Yes, you can use different pan sizes. If you use larger pans, check for doneness about 5-10 minutes earlier. For smaller pans, the baking time may be longer. Always check with a toothpick to ensure it’s baked through.
What if my cake layers sink?
Cake layers can sink for a few reasons. Too much liquid or not enough leavening can cause this. Make sure you measure ingredients correctly. If it happens, you can still frost and serve the cake. It will still taste great!
Now you have all the tools to create an amazing chocolate cake. We covered the essential ingredients, detailed step-by-step instructions, and shared tips for success. You can even explore variations and storage options to keep your cake fresh. Remember, practice makes perfect. Enjoy the joy that comes from baking and sharing with others. Your delicious cake await